Archive for March, 2011

Tiered Plate Stands

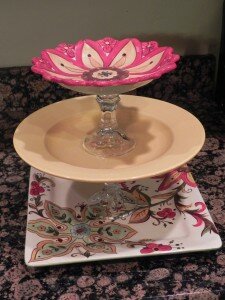
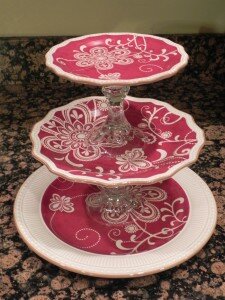
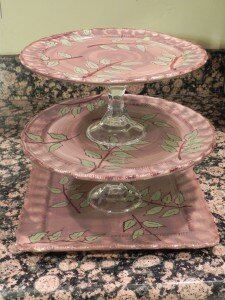
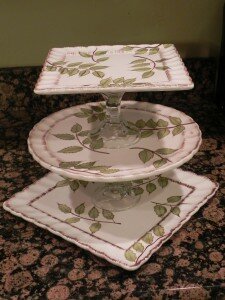
I don’t know why but I totally forgot about posting these, whoops! I made really cute tiered plate stands for my family for Christmas; I loved them and I think they did too! I actually got this idea from my mother-in-law and just couldn’t resist making some. There are so many options for their use: cookies, fruit, dip (if you have a bowl shape on top), chips, veggies, candy, the possibilities are endless!

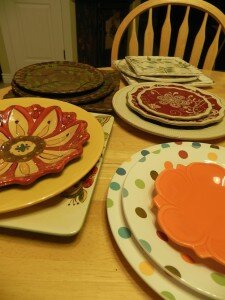
The five different styles of plates used
Here they are  finished:
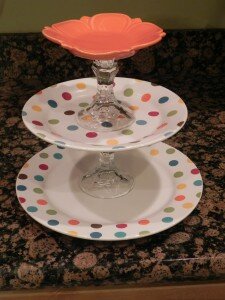
These are really easy to make, here’s how:

You will need:
  • Q-Tips
  • Paper Plate
  • 3 different sized plates – you can use any style/type of plate. The one thing I recommend is getting a plate that is completely covered in ceramic. The brown and white flowered plates that I did were not covered with ceramic on the bottom; they ended up being to porous. The glue would stick but not for long, it would seep through the ceramic and the candle stick would come loose. I haven’t found the solution to this yet but I know there is one. When I find it I will post and update.
  • 2 candle sticks – You can probably use anything that has a flat surface on the top and bottom. I used glass candle stick holder similar to the one below. I recommend staying between 2-3 inches for your height.

Assembly:

You can measure to find the center of each plate to properly place your candlesticks. I didn’t have enough patience for this (I just couldn’t wait for the end product) so I placed mine by eye. You choose! I do recommend playing around with the placement of your candlesticks before you glue them though. That will give you a rough idea of where they need to be placed if you don’t want to measure. If you don’t feel comfortable “eying it” make sure you measure to find the center of your plate!

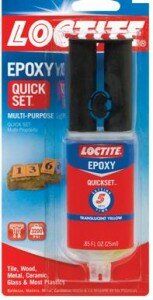
Squeeze some epoxy glue onto your paper plate. Mix it around with your Q-Tip (I also tried bypassing this step, I recommend you mix it to get the full effect of the glue). Use your Q-Tip to apply a generous amount of epoxy to the base of your candlestick and adhere it to the top of your bottom (biggest) plate. Then, apply epoxy with your Q-Tip to the top of that same candlestick and adhere it to the bottom of your middle plate. Repeat these same steps to attach your last/top plate.

I’m plan on making another tiered plate stand soon so I will take pictures of the whole process and add them to this post when its finished! If you have any questions make sure you ask me :)

The Most Wonderful Dream

I recently had a relax day with my good friend Shea. We had facials,lunch and of course stopped at pottery barn. I’m pretty sure we went through the entire store about three times. Now…… I cant stop thinking about that wonderful feeling that pottery barn gave me :) My aunt/uncle in law own a furniture store downtown. Well….. I had a dream that they decided to get rid of a TON of old furniture they didn’t need in their store anymore. I was the lucky candidate that received it all! They some how had every single piece of furniture that I’ve longed to have in my home! I was in dream HEAVEN! I had my whole house decorated and placed and my vision was complete until my sweet little babies cry woke me up ;) Someday…… someday…. sigh….it just takes time. For now I hope to continue having such sweet dreams!

Vintage Airplanes

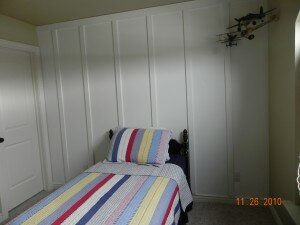
My oldest son’s bedroom is decorated in a vintage airplane feel.

Its a work in progress just like every room in my house buts its all starting to come together. I was inspired by some wall art at Pottery Barn but I cant find it on their site anymore. I decided to make it myself to add that sentimental touch. My son loved the fact that I made his airplane painting for him! So cute :) I used acrylic paint and finished it off  by spraying it with an acrylic finish. It has a little to much shine for my liking so I may have to alter it a bit but for now here it is:

I need to give some credit to my good friend Shea! I struggle with drawing 3D so she helped me draw that darn top wing and the poles, thanks buddy!

Pottery Barn Makeover

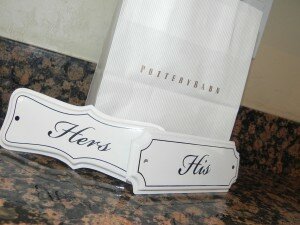
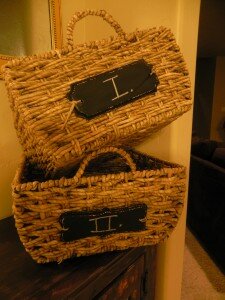
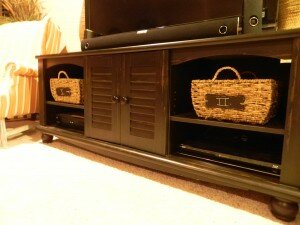
I had a lovely Pottery Barn/Restoration Hardware trip with one of my good friends Shea. If I could spend the night at Pottery Barn I totally would! What’s not to love about the decor, smells, atmosphere in that store? I was in complete heaven; as a matter of fact I think we walked through/around the store about four times! I contained myself and only ended up buying a bath sponge for my apothacary jars in my master bath, a small hourglass and these little signs. They were half off and only $3.99 a piece. I originally planned on putting these in my bathroom where they would actually serve as a his/hers signs. A few months ago I bought these cute baskets to put on my shelves on the tv stand. I decided to spray paint my little signs with some chalkboard paint and attatch them to the fronts of the baskets with some twine. They gave my baskets the exact look I was going for. I’m still in a bit of slight denial that I altered something that I bought from the actual pottery barn store….. but I think they look even more “pottery barnish” now!

linking up with these great bloggers