It’s finally finished and I’m in LOVE! It took me a little longer than anticipated but that’s usually how my projects pan out! Here is the nitty gritty….

Brooke’s inspiration picture, and the faux brick wall that she created from it, were my inspiration. The messy brick look instantly captured my heart and became the missing piece for my room. I was determined to achieve this look!
 :: source ::
I purchased the faux brick panels from Lowes and attached them to the wall using liquid nails and a nail gun.
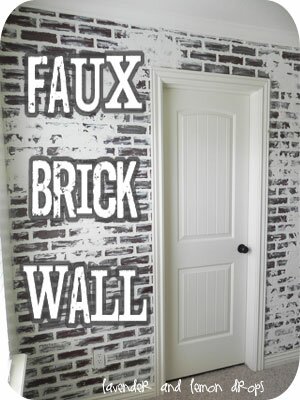
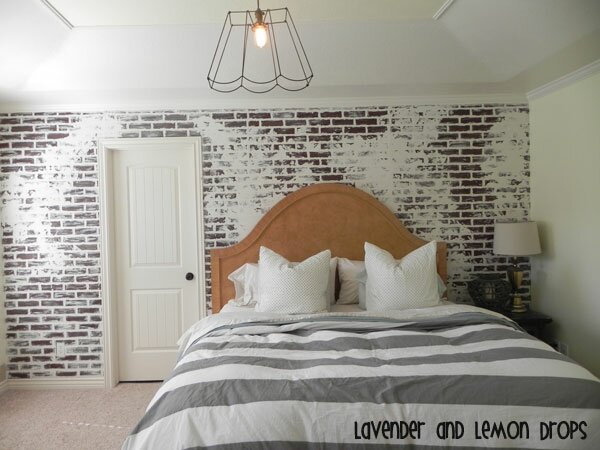
To give the wall a textured look I used joint compound in place of paint (Brooke used a white paint to cover the black grout and to create the “smeared” areas). To add extra depth and texture I used my finger to apply the compound to the grouted areas. I had to remind myself that I was after an imperfect look. The faster and thicker you layer it on the better it looks! After the grout was filled in I used a mud spatula to smear the compound in random areas. Again, aim for imperfection!
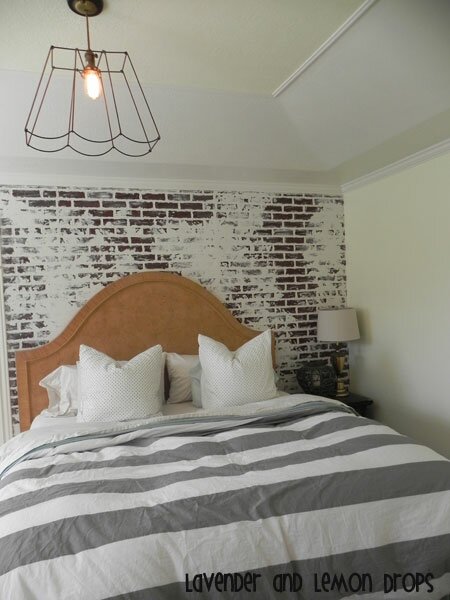
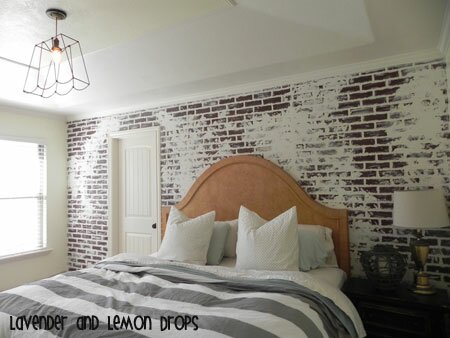
Next up on the list is reupholstering my headboard! Slowly but surely my room is coming together. Here is a little peak at what the room looks like with the bed against the wall. The missing piece was filled and my room finally has character!
 Oh and just in case you were wondering…….this is what it looked like before! The wall looks SO much smaller and sad… really its screaming “add something marvelous to me please please please” ha!
linking up with these great bloggers


Oh my goodness Erin, you have totally out done yourself! This is amazing! Congrats on finishing such a huge task & making it look so beautiful!
Awww thanks so much friend! You made my day :)
So Inspiring and beautiful! I want to do this in my basement now! You are so creative!
Thanks buddy! It would look awesome in your basement!!!!
I love this wall! What kind of panels did you use? I’ll have to go to Home Depot and check these out! Beautiful job!
Susan
Thanks Susan! They are just brick paneling similar to the beadboard panels. They should be in the same area as your big bead board panels. Also, Home Depot doesn’t carry this only Lowes :(
It looks amazing!!! I love it!
Thanks so much Jennifer :)
Erin,
Looks Beautiful…..again if only you were here to help me out….place is in desperate need! Great Job:)
Awww Thanks :) I SOOOO wish I could help you out with your cute place! If only we weren’t so far away.
WOW, that turned out great! Gorgeous in fact!
Thanks for the DIY idea!
Your the best :) Thanks for the awesome comments!
What do I think? I think it is AMAZING. Freakin amazing to be exact. Thanks so much for sharing.
tammy
ha ha ha your comment made me smile! Thanks so much Tammy :)
What an amazing wall! You did a great job.
Thanks Jennifer! :)
You definitely achieved your goal. It looks fabulous! What a good Idea to use joint compound! I am your newest follower via Linky. I hope you can visit me sometime too. I would love for you to link it up to my weekend Linky Party called Rustic Restorations Weekend.
I’m loving this and yes you definitely achieved your goal. The wall looks like an old building wall and is just gorgeous. I would love a wall like this in my house. Thanks so much for linking up with The Cure for the Common Monday. I’m off to share this post on my facebook wall for my readers, xoxo
Thanks Beth! You just gave me a little confidence boost :) Thanks for sharing my work and for visiting!
Hi Erin! I love this project soooooo much, I featured it over at my blog! Check it out here: http://www.brittanymakes.com/brittanymakes/2012/06/i-spy-a-diy-12.html
Thank you! And again, I love this!!!
Thanks so much for the feature Brittany! You are one awesome writer. I wish I had that talent ;)
I like it. A lot! Great job – give yourself a pat on the back!
Thanks Jill!!!
That looks great! I don’t think I have the patience for that, but it is beautiful!
Thanks Misty! It was a patience tester that’s for sure!
LOVE it! I actually have real bricks in our master, and I really like how much character they give to the room. here is a link you like to take a look
http://frugalaintcheap.blogspot.com/2012/04/let-there-be-light.html
You did such a great job!
Thanks Daniela! I’m so jealous of your real brick wall! I totally want to buy a house with an interior brick wall someday. For now my fake one will have to do ;)
that is AWESOME! i was just telling my husband yesterday that i wished we had an older home with exposed brick…and we were discussing how to get that look. i canNOT believe i stumbled across your blog today. it must be fate. :o) adding you to my reader!!
Oh YEAH!!!! I totally have the same dream of owning a home with exposed brick on the interior. This isn’t quite the same but its a good substitute! You would love it :)
Oh.My.Gosh! This is so freakin fabulous! Erin- you knocked my socks right off with this one! Pretty, pretty please let me feature it on my blog! It is so fantastic!!
Oh my gosh THANKS Becca!!!! I would be honored if you featured my little brick wall. Send me the link when you do and I’ll make sure to post about it on my face book page!
GREAT JOB!!! I love it! Thanks for sending it to me! LOVE, LOVE, LOVE!!!
Amazing!!! Pure Amazing!
Thank you so MUCH :)
Mmmm, really nice! Now I’m trying to decide where I could do this at my house.
~ Jeannine
Thanks Jeannine! You could seriously do this anywhere in your house that’s what I love about it!
Love this and are in the process right now of doing it. I have a question, we put the joint compound on last night and sanded it tonight but it seems to have a yellow tint now…. did you seal it with anything?
Thanks Candice! I actually didn’t sand ours. I just layered on the joint compound and left it because I wanted the “raw” look of an actual brick wall. I wonder if that’s why it has a yellow tint. I didn’t seal ours either. I hope this helps! Enjoy your new wall :)